

Last updated: October 2026
Starting a vlog in 2026 doesn’t take a studio, a film degree, or a four-figure budget. It takes a handful of gear that removes the three things that make beginner videos look and sound bad: shaky footage, muffled audio, and harsh lighting. This guide puts together the complete starter kit: camera, wireless mic, tripod, light, storage, a bag to carry it all, and free editing software. Every pick is easy to use from day one, and none of it will need replacing the moment you get good. That’s what vlogging equipment for beginners should do: get out of your way so you can spend your energy on filming, not fiddling.
As an Amazon Associate I earn from qualifying purchases.
Quick picks: the whole starter kit at a glance
- Camera: DJI Osmo Pocket 3, a pocket gimbal camera that shoots stabilized 4K with zero learning curve.
- Wireless mic: DJI Mic Mini 2, a tiny clip-on mic that instantly fixes the number-one beginner problem: bad audio.
- Tripod: JOBY PodZilla Medium Kit, with flexible legs, a phone mount included, and legs that wrap around fences and railings.
- Light: Ulanzi VL49 RGB, a palm-sized light that fits on any cold shoe or tripod thread.
- Storage: SanDisk Extreme PRO microSDXC, a fast, tough card built for 4K video.
- Bag: Peak Design Everyday Sling 3L, which carries the entire kit in one small sling.
- Editing software: CapCut, completely free and more than enough to start (not an affiliate link).
- Action alternative: DJI Osmo Action 5 Pro, the waterproof pick for travel and outdoor vlogs.
On this page:
The complete beginner vlogging kit
The eight items below cover everything a new vlogger needs: a camera, a wireless mic, a tripod, a light, fast storage, a bag, free editing software, and an action-camera alternative for the outdoors.
Every pick earned its place for the same reasons: it works the day you unbox it, it does not assume you know what you’re doing, and you will still be using it a year from now. None of this is disposable starter junk you’ll outgrow in a month.
Camera: DJI Osmo Pocket 3
The DJI Osmo Pocket 3 is the easiest way for a beginner to get footage that looks like a creator with ten times the experience. It’s a pocket camera with a built-in gimbal, a big 1-inch sensor, and a flip-around screen for selfie framing.

Image: DJI
DJI Osmo Pocket 3
This is the closest thing to a “point it at yourself and look like a pro” button: gimbal stabilization, a 1-inch sensor, 4K/120fps, and a 2-inch rotatable screen, all in a device that fits in a jacket pocket.
Most beginners buy a camera that is technically better than they are and never learn to use it. The Pocket 3 flips that around. There is no lens to choose, no rig to build, no settings rabbit hole. You unfold the screen, it turns on, and the three-axis gimbal keeps your walk-and-talk footage butter-smooth. That’s the single biggest visual difference between amateur and watchable vlogs.
The 1-inch sensor is the real story here. It gathers far more light than a phone sensor, so evening and indoor footage stays clean instead of going mushy. Add the rotating touchscreen that flips between horizontal and vertical shooting, ActiveTrack 6.0 subject tracking that keeps you in frame hands-free, and 10-bit D-Log M color for when your editing skills catch up, and this is a camera that grows with you instead of holding you back.
It records to microSD and the battery runs for well over two hours of typical use. If you want audio handled too, the Creator Combo bundles a DJI wireless mic transmitter, battery handle, and mini tripod, though our separate mic pick below gives you more flexibility for less.
Technical Features
- 1-inch CMOS sensor with up to 4K/120fps video
- 3-axis mechanical gimbal stabilization
- 2-inch rotatable touchscreen (horizontal/vertical)
- ActiveTrack 6.0 subject tracking, face auto-detect
- 10-bit D-Log M and HLG color modes
- Built-in stereo mics; microSD storage
Pros
- Stabilized footage with zero learning curve
- Big sensor = clean low-light video
- Fits in a pocket; charges fast over USB-C
Cons
- Fixed wide lens, so no zoom range to play with
- Small body can feel cramped for big hands
Wireless mic: DJI Mic Mini 2
The DJI Mic Mini 2 is a tiny clip-on wireless microphone that records clean 48kHz/24-bit audio from up to hundreds of meters away, and it fixes bad sound, the fastest way beginners lose viewers.

Image: DJI
DJI Mic Mini 2
Viewers forgive shaky video. They do not forgive bad audio. This 11-gram clip-on mic puts a real wireless microphone on your shirt in seconds and makes you sound like you recorded in a studio.
The Mic Mini 2 is the second generation of DJI’s entry-level wireless system, launched in spring 2026. Each transmitter is barely bigger than a coin, clips on magnetically, and sends 48kHz/24-bit audio straight to the receiver plugged into your camera or phone. Two-level noise cancellation cuts wind and street noise, and the all-in-one charging case keeps everything organized and topped up for around 48 hours of total use.
It also connects directly to the Osmo Pocket 3 and Osmo Action cameras with no receiver at all, which makes it the natural audio partner for this kit’s camera picks. One practical note: DJI launched it outside the US first, so American buyers may see spotty availability. The original DJI Mic Mini is nearly identical in day-to-day use and easier to find if the Mini 2 is out of stock.
Technical Features
- 48kHz/24-bit omnidirectional wireless audio
- ~11.5 hours transmitter battery; 48h with charging case
- Two-level noise cancellation, 3 voice tone presets
- Direct wireless link to DJI Osmo cameras (no receiver needed)
- Weighs about 11g per transmitter
- USB-C and 3.5mm receiver connections
- Up to 400m wireless range with the standard receiver
- Automatic limiting and five-level gain control
- Detachable magnetic clip for quick, tidy mounting
Pros
- Biggest single upgrade to video quality per dollar
- Tiny, light, and genuinely simple to use
- Direct pairing with DJI cameras, no extra gear
Cons
- US availability can be spotty, so check the original Mic Mini too
- No onboard backup recording like pricier mics
Tripod: JOBY PodZilla Medium Kit
The JOBY PodZilla Medium Kit is a flexible-legged tripod with a phone mount in the box. It stands on tables, wraps around railings and branches, and doubles as a selfie stick for walk-and-talk shots.

Image: JOBY
JOBY PodZilla Medium Kit
Beginners don’t need a tall studio tripod. They need something that holds the camera steady anywhere. The PodZilla’s bendable legs grip poles, fences, and uneven rocks, and the included phone mount means it works with your phone on day one.
This is the spiritual successor to the GorillaPod, from the same company (JOBY), built specifically for new creators. The Medium Kit supports up to 1kg (plenty for the Pocket 3, an action camera, or any phone) and weighs just 250g, so it lives in your bag instead of staying home. The push-button ball head adjusts fast, and the GripTight 360 phone mount rotates between landscape and portrait in one motion, which matters when you’re filming for both YouTube and TikTok.
Two cold-shoe mounts on the phone grip are the detail that makes this a real vlogging tool: clip the Ulanzi light on one side and the mic receiver on the other, and your phone becomes a full mini studio.
Technical Features
- Flexible legs with aluminum core, rubber grip
- 1kg (2.2lb) max load; 250g weight; 25cm tall
- GripTight 360 phone mount included (6.7-8.8cm phones)
- Push-button adjustable ball head
- Dual cold-shoe mounts for light and mic
- Standard 1/4″-20 tripod thread
Pros
- Wraps around objects for shots a rigid tripod can’t get
- Phone mount in the box, no extra purchase
- Light enough to carry every single day
Cons
- Tabletop height only, not a standing tripod
- 1kg limit rules out bigger mirrorless cameras
Light: Ulanzi VL49 RGB
The Ulanzi VL49 RGB is a palm-sized rechargeable video light with full RGB color and adjustable color temperature. It turns flat, dull indoor footage into video that actually looks lit.

Image: Ulanzi
Ulanzi VL49 RGB
Bad lighting makes every camera look cheap. This pocket light, about the size of a credit card and 100 grams, adds a soft, flattering fill light to talking-head shots and colorful accents to backgrounds.
The VL49 RGB has been a creator staple for years because it does the basics right: 360-degree color selection, 2500K to 9000K color temperature from warm to daylight, high CRI 95+ for natural skin tones, and a 2000mAh battery that runs for hours on a charge over USB-C. It mounts anywhere: three cold shoes, a 1/4″ thread, and a magnetic back that sticks to metal surfaces.
For a beginner, the honest use case is simple: set it to a warm white, prop it near your face when filming indoors at night, and watch your footage go from grey and flat to clean and professional. The RGB party tricks are a bonus for backgrounds and thumbnails.
Technical Features
- 360° RGB color + 2500K-9000K adjustable white light
- CRI 95+; 800 lux at 0.5m brightness
- 2000mAh rechargeable battery, USB-C charging
- ~100g; magnetic back; 3 cold shoes + 1/4″ thread
- 13 built-in special-effect scene modes
- LCD display for exact settings
Pros
- Instantly better indoor and night footage
- Mounts on the tripod, camera, or a fridge door
- Cheap for what it does, and a long-time favorite among creators
Cons
- Not powerful enough to light a whole room
- Small controls take a minute to learn
Storage: SanDisk Extreme PRO microSDXC
The SanDisk Extreme PRO microSDXC (256GB is the sweet spot) is a U3/V30/A2 card fast enough for 4K/120fps video and tough enough to survive being tossed in a bag for years.

Image: SanDisk
SanDisk Extreme PRO microSDXC 256GB
Nothing kills a filming day like a “card full” or “recording stopped” message. One fast, large, reliable card removes that problem entirely. 256GB holds hours of 4K footage.
This is the card action cameras and vlogging compacts are designed around. U3 and V30 ratings guarantee the sustained write speed 4K video needs, so the Pocket 3’s highest-quality modes record without dropped frames, and A2 app performance keeps transfers snappy when you dump footage to your phone or laptop. It’s also waterproof, shockproof, temperature-proof, and X-ray-proof, the kind of durability that matters when a budget card holds a day of irreplaceable footage.
Buy one 256GB card rather than four 64GB cards. Fewer card swaps means fewer chances to lose footage, and one big card is simpler to manage when you’re learning a backup routine.
Technical Features
- UHS-I, U3, V30, A2 speed ratings
- Up to 250MB/s read with QuickFlow-compatible readers
- 256GB holds hours of 4K vlog footage
- Waterproof, shockproof, temperature-proof, X-ray-proof
- Lifetime limited warranty
- Works in cameras, action cams, drones, and phones
- Write speeds up to 140MB/s for sustained 4K recording
- RescuePRO Deluxe data recovery download included
- Rated for operating temperatures from -25°C to 85°C
Pros
- Fast enough for the highest 4K modes on this kit
- One card = simpler workflow and fewer lost clips
- Recommended by action-cam makers for years
Cons
- Counterfeits exist, so buy from reputable sellers only
- Overkill if you only ever shoot 1080p on a phone
Bag: Peak Design Everyday Sling 3L
The Peak Design Everyday Sling 3L is a tiny weatherproof sling that swallows the whole starter kit (camera, mic case, light, tripod, and card) and swings to your front the second you’re ready to shoot.

Image: Peak Design
Peak Design Everyday Sling 3L
The best camera bag for a beginner is the one that makes you actually bring your gear. At 3 liters, this sling is small enough to wear all day and big enough for everything in this guide.
Peak Design’s Everyday line is the default recommendation in the camera world for a reason: the FlexFold dividers let you carve out a snug slot for the Pocket 3, a pocket for the mic charging case, and corners for the VL49 light and spare card, all in a bag that looks like a normal sling rather than a camera billboard. The 400D recycled nylon canvas shrugs off rain and scuffs, and the magnetic lid opens one-handed when the moment is happening.
Wear it across your chest while walking around town and your entire vlogging setup is a zipper pull away. That’s the difference between filming something and wishing you had.
Technical Features
- 3L capacity, fits the full starter kit
- FlexFold dividers for custom organization
- Weatherproof 400D recycled nylon canvas
- Magnetic lid with zipper security
- Crossbody or waist carry, adjustable strap
- Padded, soft-touch interior
- External carry straps included for a tripod or jacket under the base
- Weighs 0.55kg with the divider fitted
- Exterior measures 30.5 x 19.5 x 11cm
Pros
- Small enough to carry daily, big enough for the kit
- Fastest access of any bag style, swings to front
- Doesn’t scream “expensive camera inside”
Cons
- 3L fills up fast if your kit grows, so size up to 6L later
- Premium price for a small bag
Editing software: CapCut (free)
CapCut is a genuinely free video editor for phone, desktop, and browser with auto-captions, templates, and transitions. It handles everything a beginner vlog needs and costs nothing.
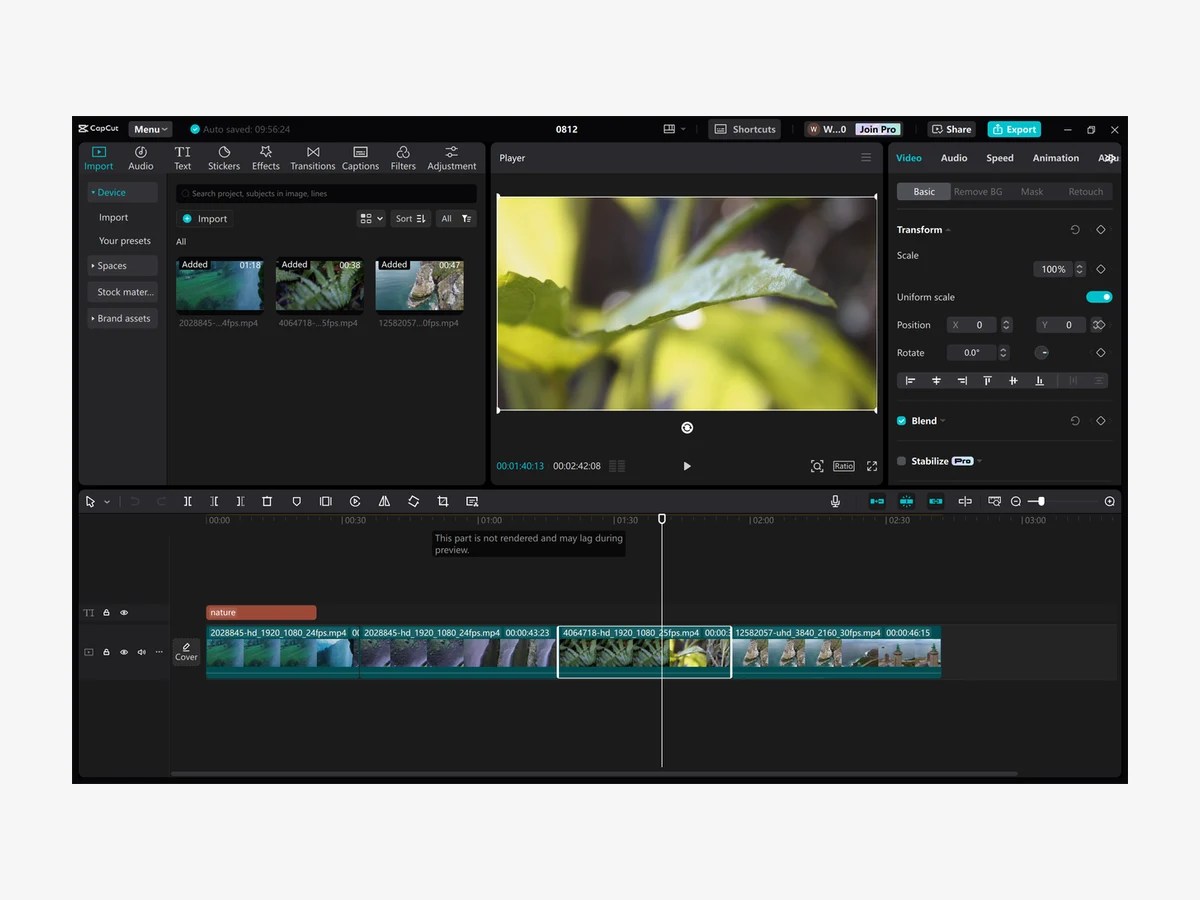
Image: CapCut
CapCut
You don’t need to pay for editing software to start. CapCut’s free tier covers cutting, captions, music, templates, transitions, and color (the complete beginner workflow), with no watermark on exports.
Here’s the honest take: paid editors like Premiere Pro are more powerful, but power you don’t use is just complexity that delays your first upload. CapCut was built for exactly your situation: someone filming on a phone or pocket camera who wants to cut a watchable video tonight. The auto-caption feature alone is worth it: burned-in subtitles are one of the highest-ROI things a new vlogger can add, and CapCut generates them in one tap.
Start here. If you ever outgrow it, you’ll know exactly which features you’re missing, and that knowledge is worth more than any subscription.
Technical Features
- Free on iOS, Android, desktop, and browser
- One-tap auto captions in multiple languages
- Templates, transitions, effects, and stock music
- Exports without watermark on the free tier
- Direct sharing to YouTube, TikTok, and Reels
- Text to speech for quick voiceovers
- One-click background removal with no green screen needed
- Built-in stabilization for shaky handheld clips
Pros
- Completely free to start, with no credit card and no trial clock
- Beginner-friendly without feeling like a toy
- Auto captions save hours of manual work
Cons
- Some advanced features sit behind paid tiers
- Cloud features need an account and internet
Action alternative: DJI Osmo Action 5 Pro
The DJI Osmo Action 5 Pro is the pick for beginners who vlog outdoors. It’s waterproof to 20m, nearly indestructible, and a fraction of the Pocket 3’s price now that its successor is out.

Image: DJI
DJI Osmo Action 5 Pro
If your vlogs involve water, bikes, hikes, or anything the Pocket 3’s gimbal wouldn’t survive, get this instead: a rugged action camera with 4K/120fps, superb stabilization, and battery life that outlasts your shooting day.
The Action 5 Pro is last year’s flagship, which is exactly why it’s a great beginner buy. The newer Action 6 pushed its price down, and it remains a thoroughly modern camera. The 1/1.3-inch sensor delivers genuinely good 4K with 10-bit D-Log M, RockSteady and HorizonSteady stabilization keep footage level without a gimbal, and it’s waterproof to 20 meters with no case. The battery runs for up to four hours, roughly double what most action cameras manage.
It also pairs directly with DJI wireless mics with no receiver, so the Mic Mini 2 pick above works here too. For a first camera on a tighter budget, or as a second, beat-it-up camera, it’s hard to argue with.
Technical Features
- 1/1.3-inch CMOS sensor, 4K/120fps, 10-bit D-Log M
- RockSteady 3.0 + 360° HorizonSteady stabilization
- Waterproof to 20m without a case
- Up to 4 hours battery life; 47GB built-in storage + microSD
- Dual OLED touchscreens (front + rear)
- Direct DJI wireless mic connection, no receiver needed
Pros
- Survives what would kill most cameras
- Discounted now the Action 6 is out, which makes it great value
- Battery life embarrasses the competition
Cons
- Smaller sensor than the Pocket 3, so weaker in low light
- Fixed ultra-wide lens isn’t ideal for sit-down talking heads
Starter kit comparison table
Every pick in one view: what it is, what job it does in your kit, and the one spec that matters most for a beginner.
| Gear | Category | Job in your kit | Key spec | Link |
|---|---|---|---|---|
| DJI Osmo Pocket 3 | Camera | Your main camera: stabilized 4K everywhere | 1-inch sensor, 4K/120fps, 3-axis gimbal | Check price |
| DJI Mic Mini 2 | Wireless mic | Clean voice audio on every video | 48kHz/24-bit, ~11.5h transmitter battery | Check price |
| JOBY PodZilla Medium Kit | Tripod | Steady shots on any surface, phone included | 1kg load, 250g, phone mount in box | Check price |
| Ulanzi VL49 RGB | Light | Flattering light for indoor and night filming | RGB + 2500-9000K, CRI 95+, ~100g | Check price |
| SanDisk Extreme PRO 256GB | Storage | Hours of 4K footage, zero dropped frames | U3/V30/A2 microSDXC | Check price |
| Peak Design Everyday Sling 3L | Bag | Carries the whole kit, ready in one motion | 3L, weatherproof, FlexFold dividers | Check price |
| CapCut | Editing software | Edit and caption your vlogs for free | Free, phone/desktop/browser, no watermark | Get free |
| DJI Osmo Action 5 Pro | Action alternative | Waterproof pick for travel and outdoors | 4K/120fps, 20m waterproof, 4h battery | Check price |
What to buy first: the order that matters
Buy in this order: microphone, then camera (or just use your phone), then storage, then tripod, then light, then bag. And grab the free editing software right now. Audio upgrades your videos more than any camera ever will.

Most beginners do this backwards. They spend everything on the camera, then wonder why their videos still look amateur. The camera was never the bottleneck. The bottleneck is almost always audio, then lighting, then stability. The camera you already own is fine for all three of your first videos.
So here’s the order that actually moves the needle:
- Microphone first. A budget wireless mic on a phone video outperforms an expensive camera using its built-in audio. Viewers leave when they can’t hear you clearly; they stay through mediocre footage with great sound.
- Camera (or your phone) second. If your phone shoots decent 4K (most phones from the last few years do), start there. Our best phones for vlogging guide shows what modern phones can do. When you’re ready for better stabilization and low light, the Pocket 3 is the step up.
- Storage third. Cheap, fast, and removes an entire category of filming-day disasters.
- Tripod fourth. The moment you want talking-head shots, timelapses, or stable B-roll, you’ll feel this missing.
- Light fifth. Indoors and at night, this is transformative. Outdoors in daylight, you won’t touch it.
- Bag last. Once you own the gear, you need a way to carry it that doesn’t make you leave half of it home.
And CapCut? Download it today. It costs nothing, and learning to edit while your kit is small means your skills arrive at the same time as your gear.
Two ways to start: your phone or a dedicated camera
You can start vlogging two ways: with the phone you already own plus a mic and tripod, or with a dedicated camera like the Pocket 3. The phone path is cheaper and starts today; the camera path gives you better stabilization, low light, and battery life.
Path 1: Start with the phone in your pocket
If your phone shoots 4K, you already own a good enough camera. Add the DJI Mic Mini 2, the JOBY PodZilla, and CapCut, and you can publish your first ten videos this week.

This path has one unbeatable advantage: zero friction. Your phone is always with you, always charged, and you already know how to use it. Clip on the mic, mount it on the PodZilla, and film. The PodZilla’s cold shoes even let you mount the VL49 light and mic receiver right on the phone grip.
The limits show up eventually: phones overheat on long 4K recordings, their batteries drain fast, and digital stabilization crops your frame. When you hit those walls consistently, not before, that’s your signal to move to Path 2.
Path 2: Start with a dedicated camera
A dedicated camera like the DJI Osmo Pocket 3 gives you a real gimbal, a bigger sensor for low light, and a battery that lasts through a full shooting day, worth it if you’re sure vlogging is your thing.
This is the path for people who’ve already been filming on their phone for a while and know they’ll stick with it, or who simply want the best-looking footage from day one. The Pocket 3 removes the phone’s weaknesses in one purchase: mechanical stabilization that doesn’t crop, a 1-inch sensor that handles dim restaurants and golden hour, and a device whose only job is filming, so your phone stays free for everything else.
Either way, the rest of the kit is identical. Mic, tripod, light, storage, and bag all transfer between paths, which is exactly why they’re the smart purchases. If you’re torn between camera types more broadly, our roundup of the best vlogging cameras and the best flip-screen cameras cover the rest of the options.
What to skip when you’re starting out
Skip drones, gimbals, extra lenses, studio lighting kits, and paid editing software. Every one of them is a great purchase for a vlogger with fifty videos, and a distraction for a vlogger with five.
Beginner gear mistakes all share the same shape: buying the tool for the vlogger you imagine being in two years instead of the one you are today. Here’s what to leave on the shelf:
- Drones. Amazing footage, but they add learning curves, regulations, and no-fly headaches. Master the ground game first, then check our drones for vlogging guide when aerial shots are the missing piece.
- A handheld gimbal for your phone. The Pocket 3 already has one built in, and the PodZilla covers static shots. A separate gimbal is a third purchase solving a problem you don’t have yet.
- Interchangeable-lens cameras and lens collections. If you already shoot Canon and want to stay in that system, our Canon flip-screen guide has you covered, but a beginner buying their first lens is buying homework, not footage.
- Big lighting kits. One VL49 beats a three-point studio setup you never assemble because it takes twenty minutes.
- Paid editing software. CapCut is free and exports without watermarks. Pay for software when a specific paid feature is the thing standing between you and a video you’re actually making.
The rule of thumb: if a purchase doesn’t help you publish your next video faster or make it noticeably better, it’s not beginner gear. It’s a future-you problem.
How we chose this kit
This kit was put together through hands-on spec research, creator feedback, and current product availability, not sponsored placements and not hands-on testing of every item.
Our selection process: We started with the beginner’s actual problems (bad audio, shaky footage, poor lighting, confusing gear) and chose one product per category that solves its problem with the least learning curve. Every pick had to meet four tests: it must be currently sold and supported in 2026, it must work within minutes of unboxing, it must be widely recommended by working creators (not just advertisers), and it must still be useful a year into vlogging.
What we didn’t do: We did not hands-on test every product listed here, and we won’t pretend we did. Recommendations come from manufacturer specifications, professional reviews, long-term creator feedback, and our own experience with this category of gear. When a product has a real caveat (like the Mic Mini 2’s spotty US availability), we say so instead of hiding it.
On affiliate links: Links to Amazon use our affiliate tag, which supports this site at no extra cost to you. It doesn’t influence rankings. CapCut, our software pick, is free and earns us nothing, and it’s here because it’s genuinely the best starting point.
Beginner vlogging equipment FAQs
The questions every new vlogger asks about gear (how much to spend, whether a phone is enough, and what actually matters), answered straight.
How much does beginner vlogging equipment cost in 2026?
Less than most people expect. The full kit (camera, mic, tripod, light, storage, bag, and free software) costs less than a single mid-range mirrorless camera body. And the phone-first path in our buying guide cuts that dramatically, since the mic, tripod, and free editing app are the only purchases you need to start publishing.
The trap isn’t spending too much, it’s spending in the wrong order. A wireless mic improves your videos more than a camera upgrade ever will, so budget for audio before anything else.
Should I buy a ready-made vlogging kit or build my own?
Build your own, in the order this guide gives you. Ready-made bundles look convenient, but they usually pair one decent headline item with a weak microphone, a dim light, or a tripod you will replace within months, and the bundle price hides which parts you are really paying for. Buying the pieces separately means every item earns its place, and you can spread the purchases out as your budget allows.
The exception is a bundle built around a product you already want, like the Osmo Pocket 3 Creator Combo, which adds DJI’s own mic transmitter, battery handle, and mini tripod to the camera. If every extra in the box is something you would buy anyway, and the total costs less than the parts bought separately, a bundle like that makes sense. Otherwise, piece by piece wins.
Can I start vlogging with just my phone?
Yes. Honestly, you should. Any phone from the last few years shoots good 4K video. Add a clip-on wireless mic and a small tripod, and your phone setup will outperform most beginners’ dedicated cameras, because you’ll actually bring it everywhere and film constantly.
Move to a dedicated camera when your phone consistently limits you: overheating on long recordings, dying batteries mid-shoot, or shaky footage you can’t fix. Until then, the phone is the right camera. Our best phones for vlogging guide goes deeper on getting the most from one.
What microphone should a beginner vlogger buy first?
A small wireless clip-on mic like the DJI Mic Mini 2. It clips to your shirt in seconds, records clean audio from across the room, and works with cameras and phones alike. Audio is the number-one quality difference between videos people finish and videos people abandon, so this is the highest-impact purchase on the list.
Wired lav mics are cheaper, but the cable becomes a daily annoyance. Wireless is worth the step up for the freedom alone.
Do I really need a light for vlogging?
If you film indoors or at night, yes. It’s the cheapest dramatic upgrade available. A small light like the Ulanzi VL49 RGB set to a warm white and placed near your face turns flat, grey indoor footage into clean, professional-looking video. Outdoors in daylight you won’t need it at all, which is why it’s a “buy fifth” item, not a “buy first” one.
Start by filming near a window during the day (free, and genuinely the best light available). Buy the pocket light for everything after sunset.
How much storage do I need for 4K vlogging?
A 256GB card is the sweet spot for beginners. It holds hours of 4K footage, so you’re not swapping cards mid-shoot or deleting clips to make room. More important than size is speed: look for U3/V30 ratings, which guarantee the sustained write speed 4K video requires.
Whatever you buy, build the habit early: back up footage to a computer or cloud drive after every shoot. Memory cards are for capturing, not archiving.
What is the best free editing software for beginners?
CapCut. It’s free on phone, desktop, and browser, exports without watermarks, and its one-tap auto captions alone save beginners hours of work. It handles the complete beginner workflow (cutting clips, adding music and transitions, basic color) without the learning cliff of professional editors.
Upgrade to paid software only when you can name the specific feature you’re missing. “Everyone uses Premiere” is not a reason; a missing feature is.
Is the DJI Osmo Pocket 3 still worth buying in 2026?
Yes. Newer pocket cameras exist, but the Pocket 3 remains the easiest path to great-looking vlog footage: a real gimbal, a 1-inch sensor, and a flip screen in your jacket pocket. It’s also frequently discounted now, which makes it one of the best value picks in vlogging.
If you want the absolute latest, check our best vlogging cameras roundup for what’s current, but “not the newest” and “not worth buying” are very different things.
Do beginners need a tripod?
The moment you want to be in your own videos (talking to the camera, filming a tutorial, shooting a timelapse), yes. A flexible mini tripod like the JOBY PodZilla is the right first tripod because it works on tables, wraps around railings and branches, and doubles as a handheld grip for walk-and-talk shots.
You don’t need a tall standing tripod yet. Those matter for studio setups; a tabletop tripod covers everything a beginner films.
What should I upgrade first after the starter kit?
Whichever item is currently limiting the videos you’re actually making. If you’re filming in the dark a lot, a bigger light. If you’re traveling, the action camera. If your bag is overflowing, the 6L sling. The wrong answer is upgrading whatever looks shiniest. Let your footage tell you what’s missing.
For most creators, the real “next level” isn’t gear at all: it’s a second battery or power bank (dead gear films nothing) and learning to edit faster. Both are cheaper than any camera.
Where should beginners buy vlogging equipment?
Buy from reputable sellers: Amazon (via the links on this page), the manufacturers’ own stores, or established camera retailers. This matters especially for memory cards, where counterfeits are common and a fake card can corrupt a day of footage.
Timing helps too: camera gear goes on serious sale around Black Friday, and our Black Friday camera deals page tracks the real discounts each year so you don’t pay full price for patience.
Keep exploring
Your kit is sorted. Now pick your camera, your niche, or your next upgrade from our other vlogging guides.